Masternodes with NodeValet
We've thought long and hard about how to make Masternodes easy and accessible and the result was NodeValet. NodeValet will install a rock solid Masternode with a VPS provider of your choice for about 2$ each. On top of that these masternodes will maintain themselves and even automatically update wallets. You won't need to log in to a VPS and you won't need to fiddle around with the debug console. NodeValet takes care of it. Safe, easy and convenient.
Step 1: Collateral
To run a Helium Masternode you will need 1000 HLM collateral. These coins will be kept in and locked in your local wallet. For every Helium Masternode you will need an address with 1000 HLM.
To start, go to the Receive tab in your Helium wallet and click 'Request Payment' to receive a new receiving address. Repeat this for every Masternode you want to run and copy the addresses to a text file for future reference.
Next, send exactly 1000 HLM to each address. Masternode collateral should be no more or no less than 1000 so send 1000 to each address you want to use for a masternode. Click the 'Send' tab and make x transactions to the addresses you saved before by using the 'add recipient' button.
Now that you have funded your masternode addresses with 1000 HLM each you are ready for the next step.
Step 2: a VPS
The proper way to run a masternode is with a hot/cold set up. This means you will keep your coins in your local wallet and let an external server handle the rest. This can be difficult to set up. Hence NodeValet was created.
All you need to do is make an account with one of the supported VPS providers.
For now these are VULTR and Digital Ocean.
NodeValet will take care of the entire set up process but in order to do that it briefly needs API access. Handing over your API key to NodeValet means it can instruct your account to make a VPS according to your (its) needs. NodeValet doesn't store this key, neither does NodeValet store any of your info.
To open an account with either VPS provider surf to https://nodevalet.io and click 'get started' or use any of the links below.
VULTR: https://www.vultr.com/?ref=7695793
Digital Ocean: https://m.do.co/c/c4e2404b370a
Using a referral link will keep NodeValet running and will also get you up to 100$ in free credit. Do consider a donation as well :)
With your (new) VPS account go fetch your API key.
VULTR:
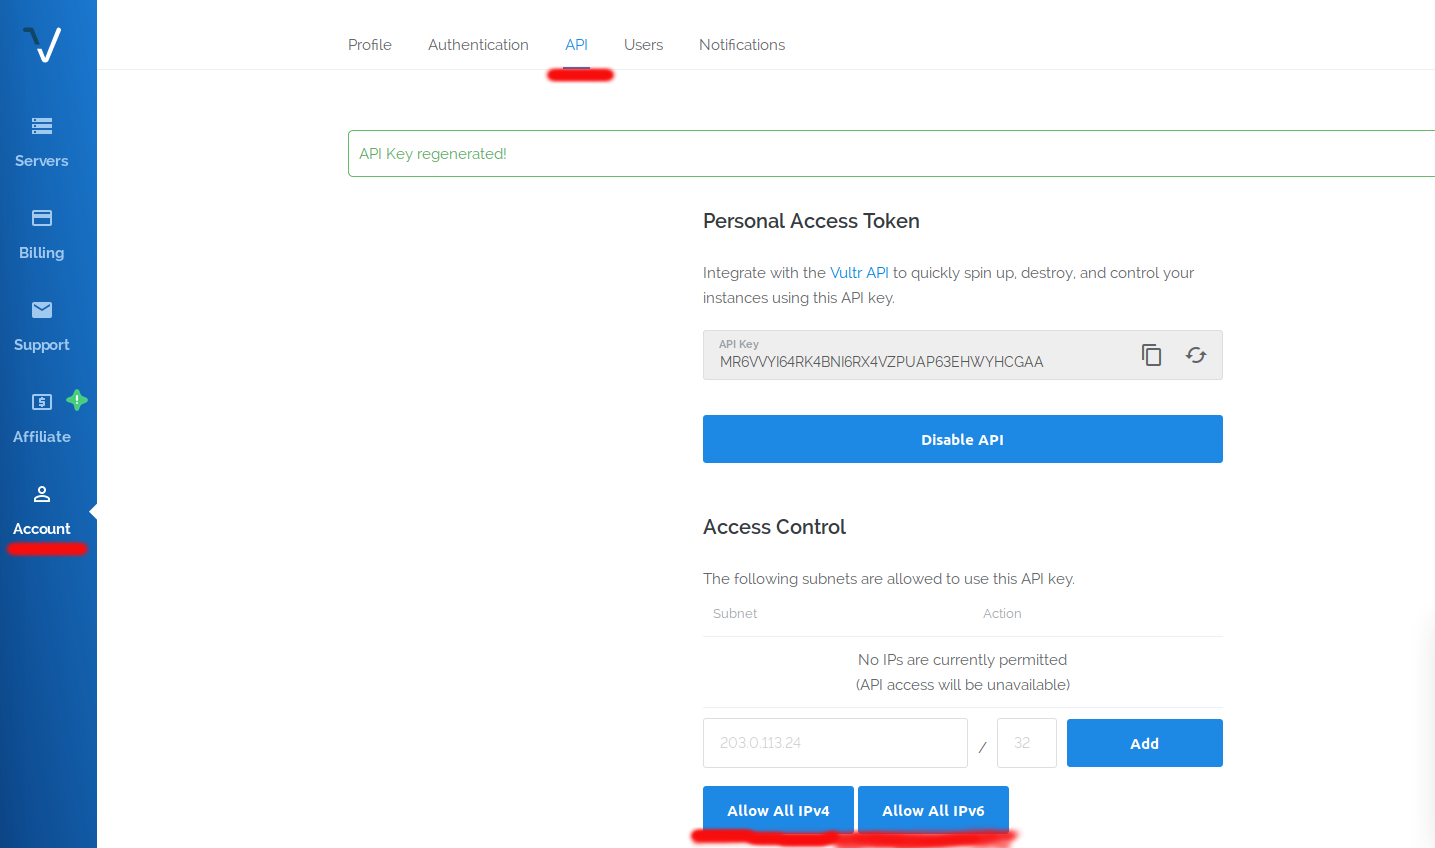
Click 'account', click 'API' and click 'Allow all IPv4' and 'Allow all IPv6'. VULTR will present you with a Personal Access Token. This is your API key.

DIGITAL OCEAN:
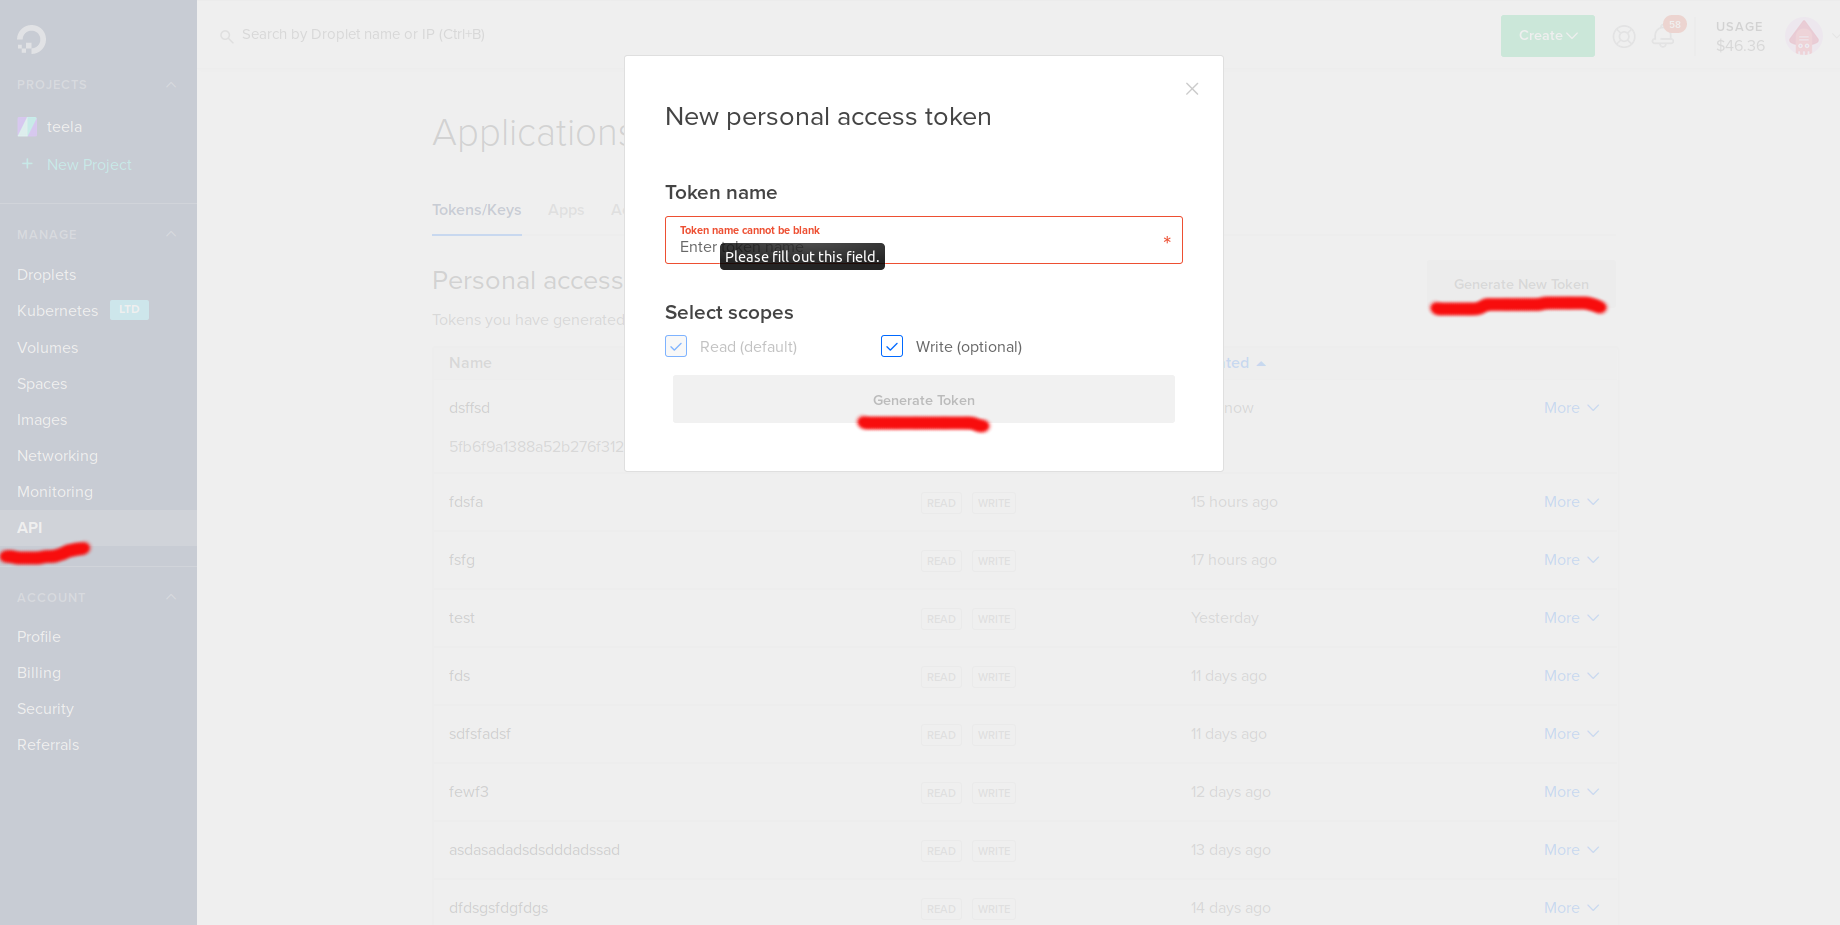
Click API on the bottom left, click `Generate New Token' on the right. Enter a name, click 'Generate Token'. DO will now make an API key for you.

Step 3: NodeValet
Now that we have a VPS provider and our collateral we can surf to https://nodevalet.io.
On the top right click 'deploy masternode'
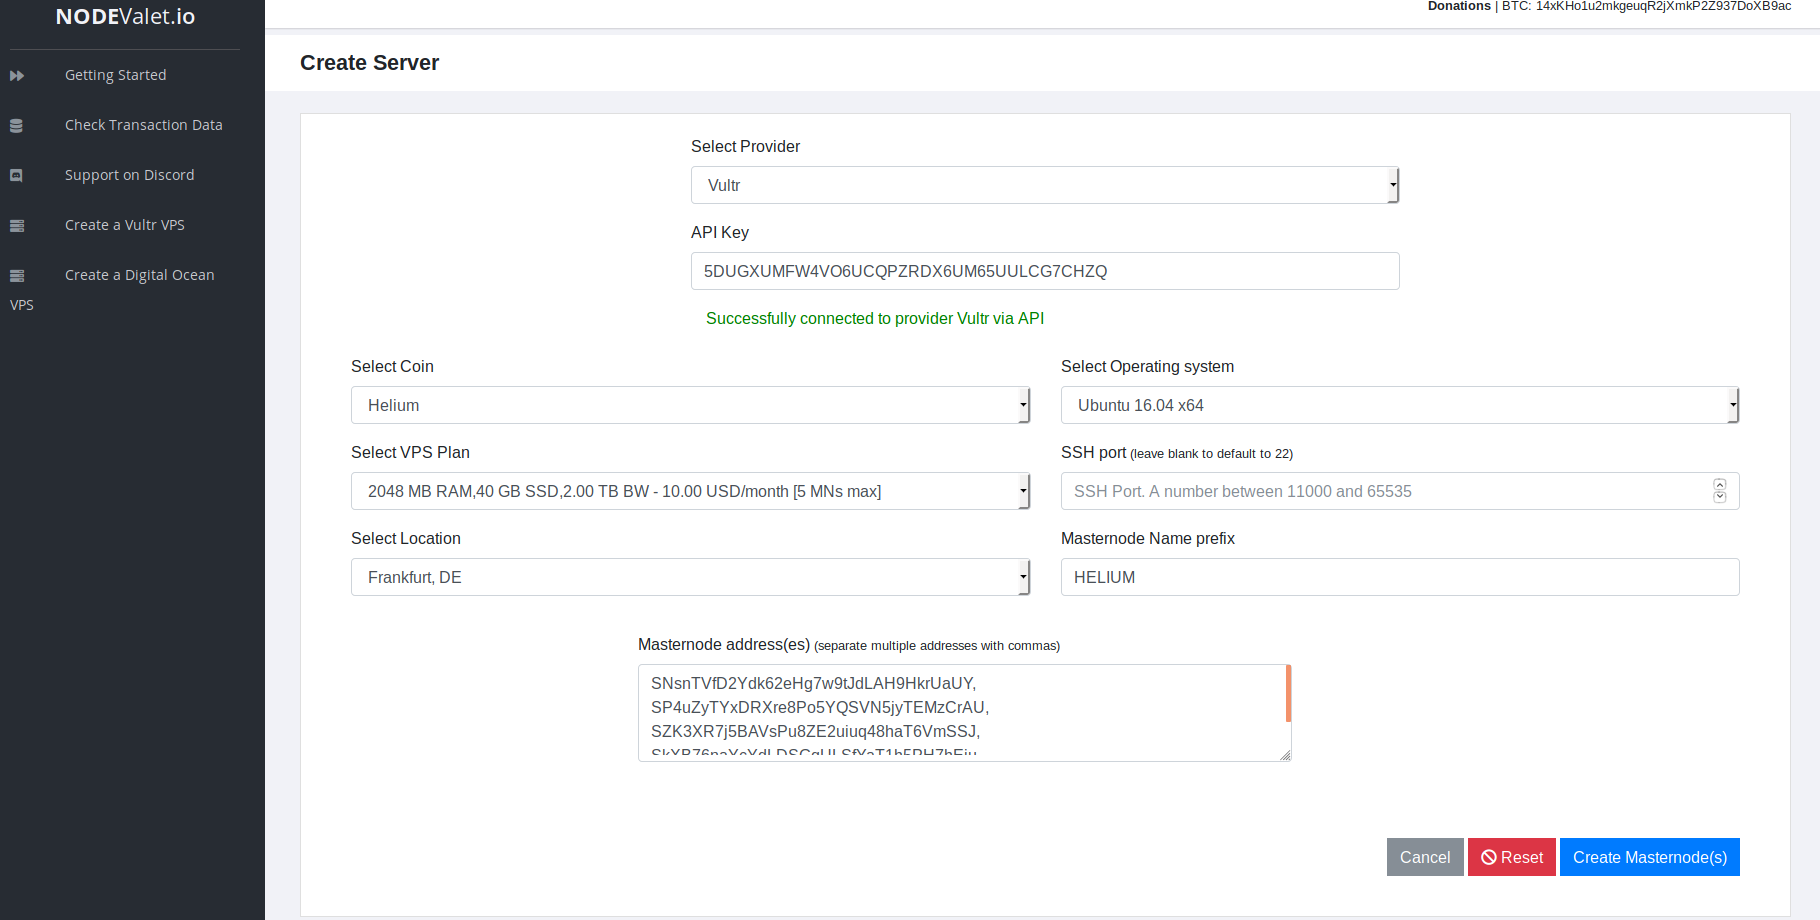
NodeValet will ask you for your VPS provider and your API key. Enter your VPS provider and the key we just retrieved and hit 'Test API connectivity'

On the next screen we will fill in some basic info. We pick a coin (Helium), pick the server location, pick number of masternodes we want to install and we provide the addresses that hold our collateral. Since NodeValet is smart enough to figure the rest out by itself we don't need to do much more. You can install up to 20 masternodes with NodeValet in a single go and NodeValet will tell you what server to pick resource wise.

Step 3: The Magic
Once you've filled everything in and click 'Create Masternode(s)' the scripts take over. They harden the server, install the wallet and make sure everything works. NodeValet Masternodes are very secure, maintain themselves and even automatically update wallets. All of this will take about 5 minutes.
Once it is done. Please don't forget to change your API key or turn off API access all together. NodeValet doesn't store it and there is not a lot that can happen even if they did. But its always better to make sure.
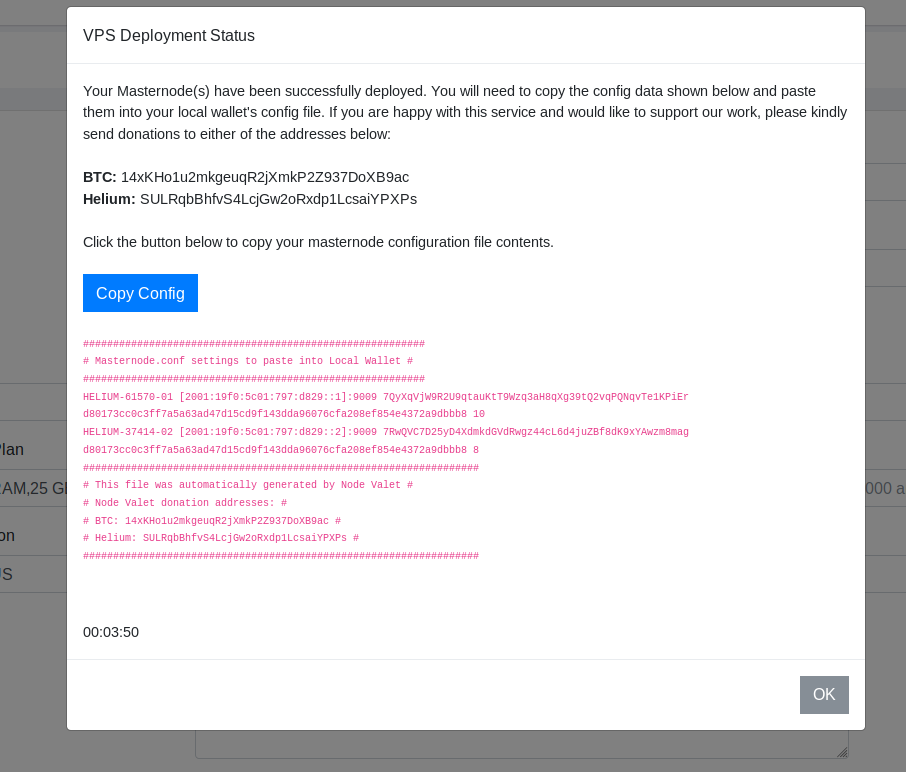
Once your masternodes are set up and installed NodeValet presents you with the configuration for your local wallet. All you will need to do is open your wallet, click 'Tools', click 'Open Masternode Configuration File' and paste in the information.

Once that is done. Save it, restart your wallet. Go to the 'Masternodes' tab and click 'Start Missing'. Since the NodeValet setup up literally takes only minutes and your nodes can take some time to sync. The start command might not go through if your nodes aren't fully synced yet so if you see them go "Missing" just wait a bit and start them again.
To keep things simple NodeValet runs a version of the Nodemaster script on the back end. While you likely won't have to log in to your VPS since the maintanance scripts are pretty good. In case you do need to you can count on community support.
Expect an advanced user's guide here in due time. Happy masternoding!
Updated about 7 years ago
